Introduction
If you’ve recently purchased a new dryer or moved into a new home, you might notice that current safety standards require four-prong dryer cords. Upgrading from a three-prong to a four-prong cord ensures compliance with the National Electrical Code and improves safety by separating the ground and neutral wires. Understanding the correct method to install a four-prong dryer cord is crucial for avoiding electrical hazards and ensuring your dryer operates efficiently.
Safety Precautions and Tools Needed
Safety Precautions
Before starting any electrical project, it’s essential to follow safety guidelines to prevent accidents.- Disconnect the power: Unplug the dryer from the electrical outlet to ensure there is no active power flowing. This step is critical and must not be overlooked.- Work in a dry environment: Ensure your workspace is dry to avoid any risk of electric shock.- Wear protective gear: Use rubber-soled shoes and gloves to protect yourself from electrical hazards.
Tools and Materials
Gathering the right tools before you begin will make the installation process smoother. Here’s what you’ll need:- Screwdrivers (Phillips and flathead)- Pliers- Wire cutters/strippers- Four-prong dryer cord- Multimeter for testing connections
Once you have all your tools ready, you’re set to understand the configuration and proceed with the installation.
Understanding the Four-Prong System
Differences Between Three-Prong and Four-Prong
A three-prong cord combines the ground and neutral wires, which may create a shock hazard if the neutral wire becomes loose. In contrast, a four-prong cord separates these connections, enhancing safety by providing a distinct path for electrical currents and preventing potential electric shocks.
National Electrical Code Compliance
Compliance with the National Electrical Code (NEC) is non-negotiable for electrical projects. The NEC mandates the use of four-prong dryer cords to ensure modern safety standards are met. Adhering to these rules not only safeguards your home but also increases the resale value by meeting current safety regulations.
Removing the Old Cord
Disconnecting the Dryer
Ensure the dryer is unplugged from its power source. This is the first critical step in ensuring your safety throughout the project.
Removing the Dryer Access Panel
Locate and remove the access panel on the back of your dryer. This is typically secured with screws which can be removed using a screwdriver. Keep these screws safe, as you will need them to reattach the panel later.
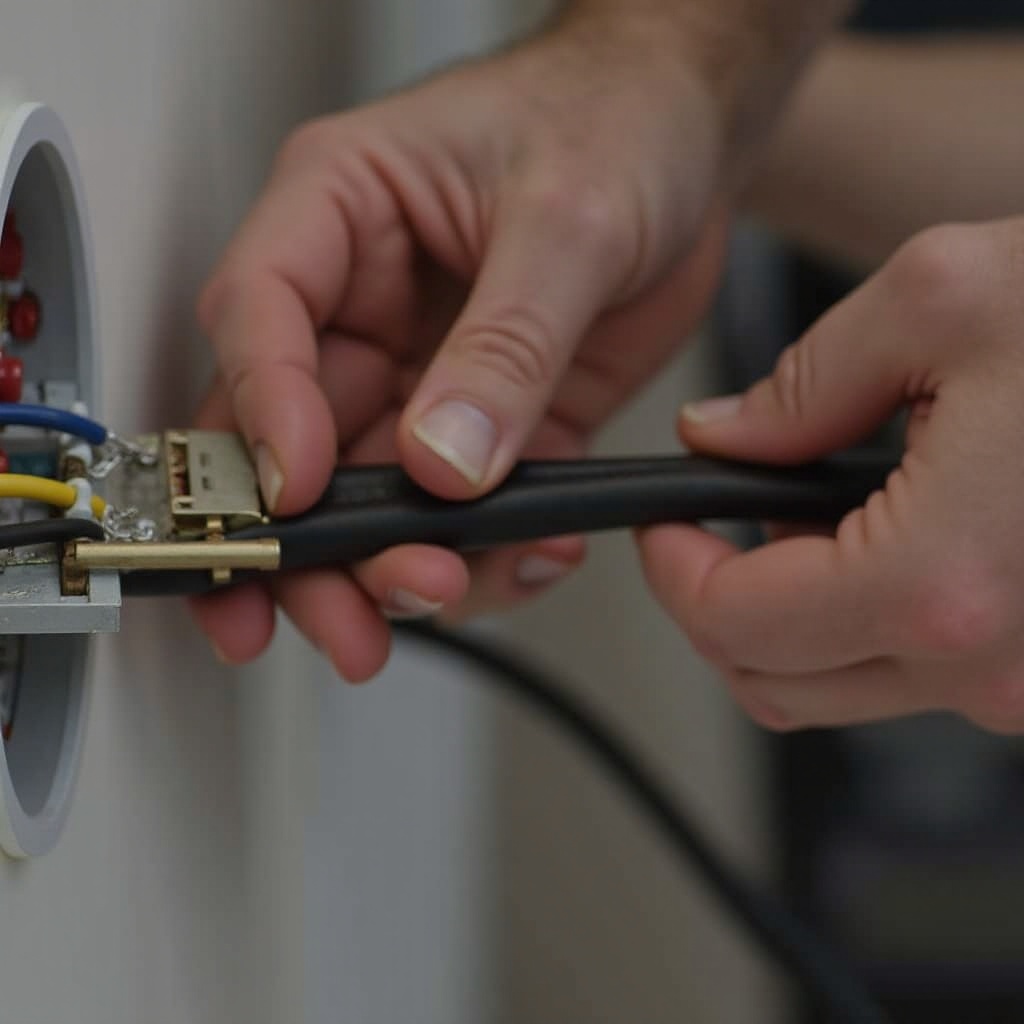
Steps to Remove the Old Cord
- Loosen the screws: Find the terminal block where the cord connects to the dryer. You will see three terminals with screws holding the wires in place.
- Detach the cord: Carefully remove the screws and detach each wire from the terminal block. Remove any clamps or brackets securing the old cord.
- Remove the old cord: Once the wires are free, gently pull the old cord out of its housing.
You’re now ready to install the new four-prong dryer cord.
Installing the New Four-Prong Cord
Preparing the New Cord
- Find the terminal block: Just like with the old cord, locate the terminal block on your dryer.
- Check the wire ends: Ensure the ends of the four-prong cord wires are stripped and ready to insert into the terminal block.
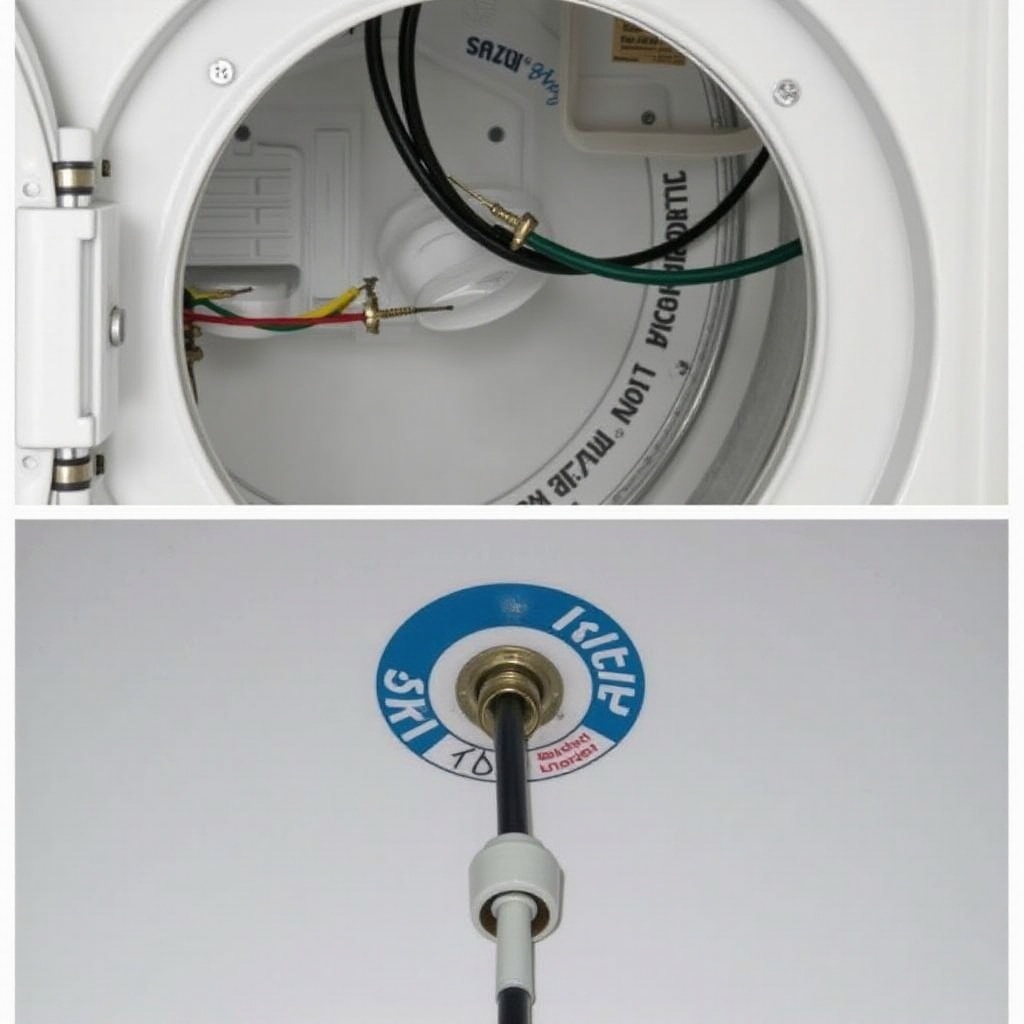
Connecting the Ground Wire
- Identify the ground wire: The ground wire is typically green.
- Connect the ground wire: Attach it to the dryer’s ground screw or the frame near the terminal block. Tighten the screw securely.
Attaching the Neutral Wire
- Identify the neutral wire: It is usually white.
- Connect the neutral wire: Attach the neutral wire to the center terminal on the terminal block. Ensure it is tightly secured.
Connecting the Hot Wires
- Identify the hot wires: These wires are generally red and black.
- Connect the hot wires: Attach each hot wire to the respective outer terminals on the terminal block. Make sure the connections are secure.
Securing the Connections
- Tighten all terminal screws: Ensure all wires are tightly secured, with no exposed wire.
- Check the cord clamp: Ensure the cord is held securely by a clamp or bracket to prevent any movement.
With the cord securely installed, proceed to test and verify the connections.
Testing and Final Checks
Testing the Connections
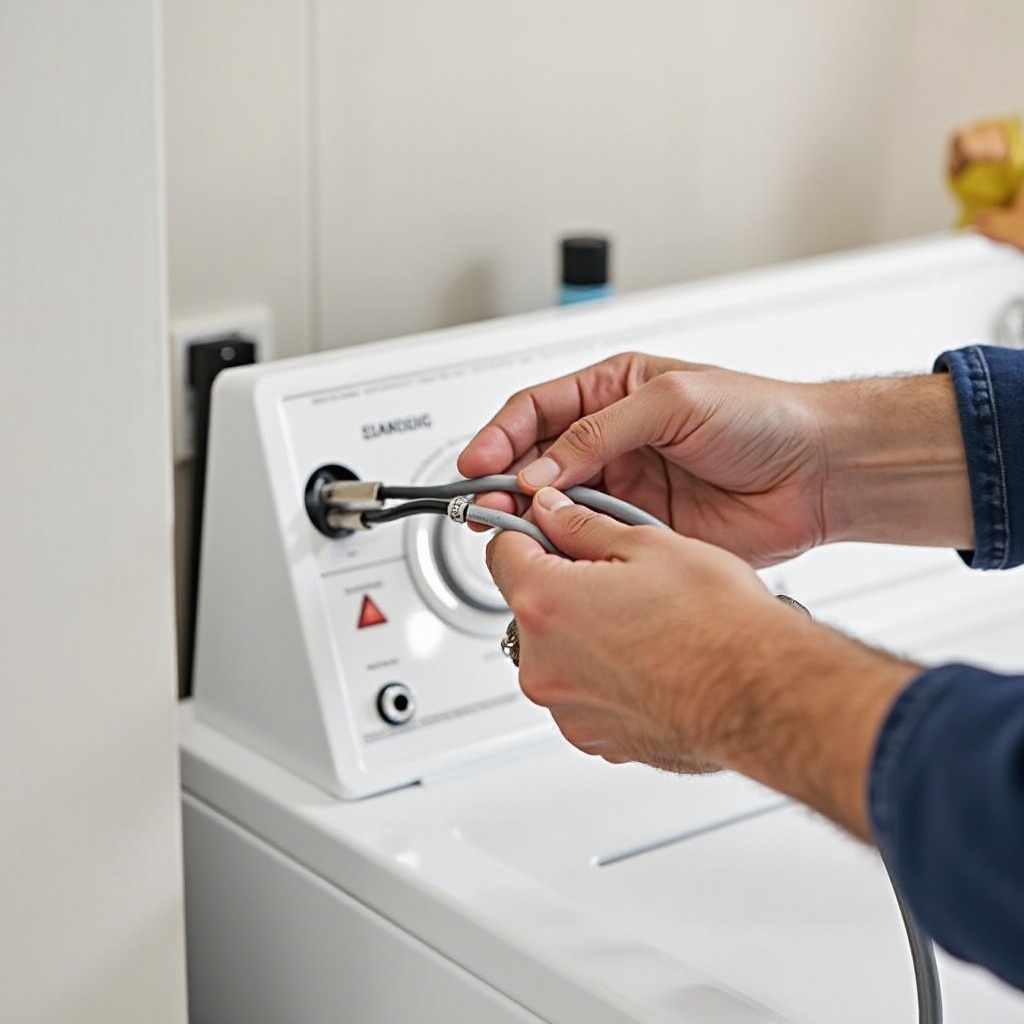
- Reattach the access panel: Screw the access panel back into place.
- Plug in the dryer: Reconnect the dryer to the electrical outlet.
- Use a multimeter: Check the connections for proper voltage and grounding.
Running a Test Cycle
- Start the dryer: Run the dryer on a short cycle without any clothes inside.
- Monitor the dryer: Ensure it runs smoothly without any unusual noises or behaviors. Verify that the controls and heating elements function correctly.
If everything appears in order, you have successfully installed your new four-prong dryer cord!
Troubleshooting Common Issues
Loose Connections
If the dryer doesn’t start, check for loose connections at the terminal block. Tighten any screws that may have come loose during the installation process.
Electrical Surges
If you notice electrical surges, ensure the ground wire is properly connected. A faulty ground connection can cause instability in electrical flow.
Dryer Not Starting
- Check the outlet: Verify that the dryer’s power outlet is functional by plugging in another appliance to see if it works.
- Inspect the cord: Double-check that all connections are tight and secure.
Addressing these common issues can help ensure your dryer is operating efficiently and safely.
Conclusion
Installing a four-prong dryer cord is a task that you can manage yourself with the right tools and careful attention to detail. This guide has walked you through each step, ensuring a thorough understanding of the process and the importance of adhering to safety standards. Enjoy the enhanced safety and functionality of your newly installed dryer cord.
Frequently Asked Questions
What are the necessary tools for installing a four-prong dryer cord?
To install a four-prong dryer cord, you will need screwdrivers (both Phillips and flathead), pliers, wire cutters/strippers, the new four-prong dryer cord, and a multimeter for testing the connections.
Can I install a four-prong dryer cord myself, or should I hire a professional?
Yes, you can install a four-prong dryer cord yourself if you follow safety precautions and detailed instructions carefully. Make sure to disconnect the power and double-check your work.
What should I do if my dryer still doesn't work after installation?
If your dryer still doesn't work after installation, check for loose connections, ensure the power outlet is functional, and make sure the wires are correctly attached. If issues persist, consult a professional electrician.